
Pre-Installation Assessment: Vehicle Compatibility and Structural Readiness
Before installing a swivel seat, verify your vehicle’s structural readiness. This critical step prevents installation failures and ensures long-term safety.
Verifying Mounting Points, Floor Integrity, and OEM Anchor Compatibility
Make sure the mounting holes match up exactly with where the swivel base bolts go. Check the floor condition too, particularly important in older cars, looking out for rust spots or weak areas since over three quarters of all retrofit problems come down to bad floors according to Transportation Safety Journal from last year. Don't just guess about whether anchors will work together with original equipment manufacturers specs need to be checked against what's actually there on the vehicle. When tightening those bolts, remember they should be between 95 and 110 foot pounds of torque. Also worth noting if someone has changed anything at the anchor points before installation starts because any changes made previously must get approved by an engineer first to ensure everything stays safe and secure.
Identifying Vehicle-Specific Constraints (e.g., Driveshaft Tunnel, Seat Track Obstructions)
Start by marking out the space needed around where the seat sits. For those working on vans or SUVs specifically, check how much the driveshaft tunnel sticks out since this often cuts down on how far someone can actually turn their seat, sometimes limiting it by anywhere from 30 to 50 degrees. Look closely at what's blocking movement along the track itself. There might be things like wires running through there, air conditioning ducts, or even parts of the vehicle frame getting in the way. These obstacles will impact not just how smoothly the seat rotates but also how much room passengers have for their legs. When testing if there's enough space all the way around, make sure to lift the seat as high as possible while nobody is sitting there to simulate the worst case scenario for potential snags. Keep track of anything that needs to stay removed permanently, such as certain pieces of interior trim, so nothing gets stuck when people are using the seat regularly.
Swivel Seat Installation: Step-by-Step Mechanical Setup
Precise Base Alignment, Bolt Pattern Matching, and Torque-Critical Fastening (95–110 ft-lbs)
Make sure the swivel base sits flat on the vehicle floor and lines up exactly with where the factory mounted it. Getting this right matters because even a tiny misalignment of just 1 or 2 millimeters can cause problems down the road like stress cracks forming or parts dragging when they shouldn't. Always go with the templates provided by the manufacturer instead of trying to eyeball things. These help match up the bolt holes properly with those original equipment manufacturer (OEM) anchor points. When tightening all those bolts, do it gradually following a crisscross pattern across the base. Finish off with a good quality torque wrench set between 95 and 110 foot pounds. We've seen plenty of cases where bolts that weren't tightened enough give out much quicker when subjected to vibrations from driving around. On the flip side, going too tight can actually strip threads or worse yet, pull through the anchors completely.
Swivel Mechanism Engagement and 360° Rotation Clearance Validation
To engage the swivel mechanism, line up the locking pin with the receiver plate until there's that unmistakable click sound that tells everyone it's properly seated. Next step is to test out the full 360 degree rotation, taking care to move it slowly and methodically across different seat heights and positions around the vehicle. Keep at least one and a half inches between moving parts and anything fixed like driveshafts, seat tracks, wires running through the floor, or those door panels we all know are there but never think about. This spacing prevents annoying things like rubbing surfaces, stuck mechanisms, or gradual wear over time. Do this inspection before putting on any upholstery or installing control systems because once those extra bits get attached, their weight and stiffness might change how much space actually exists between everything.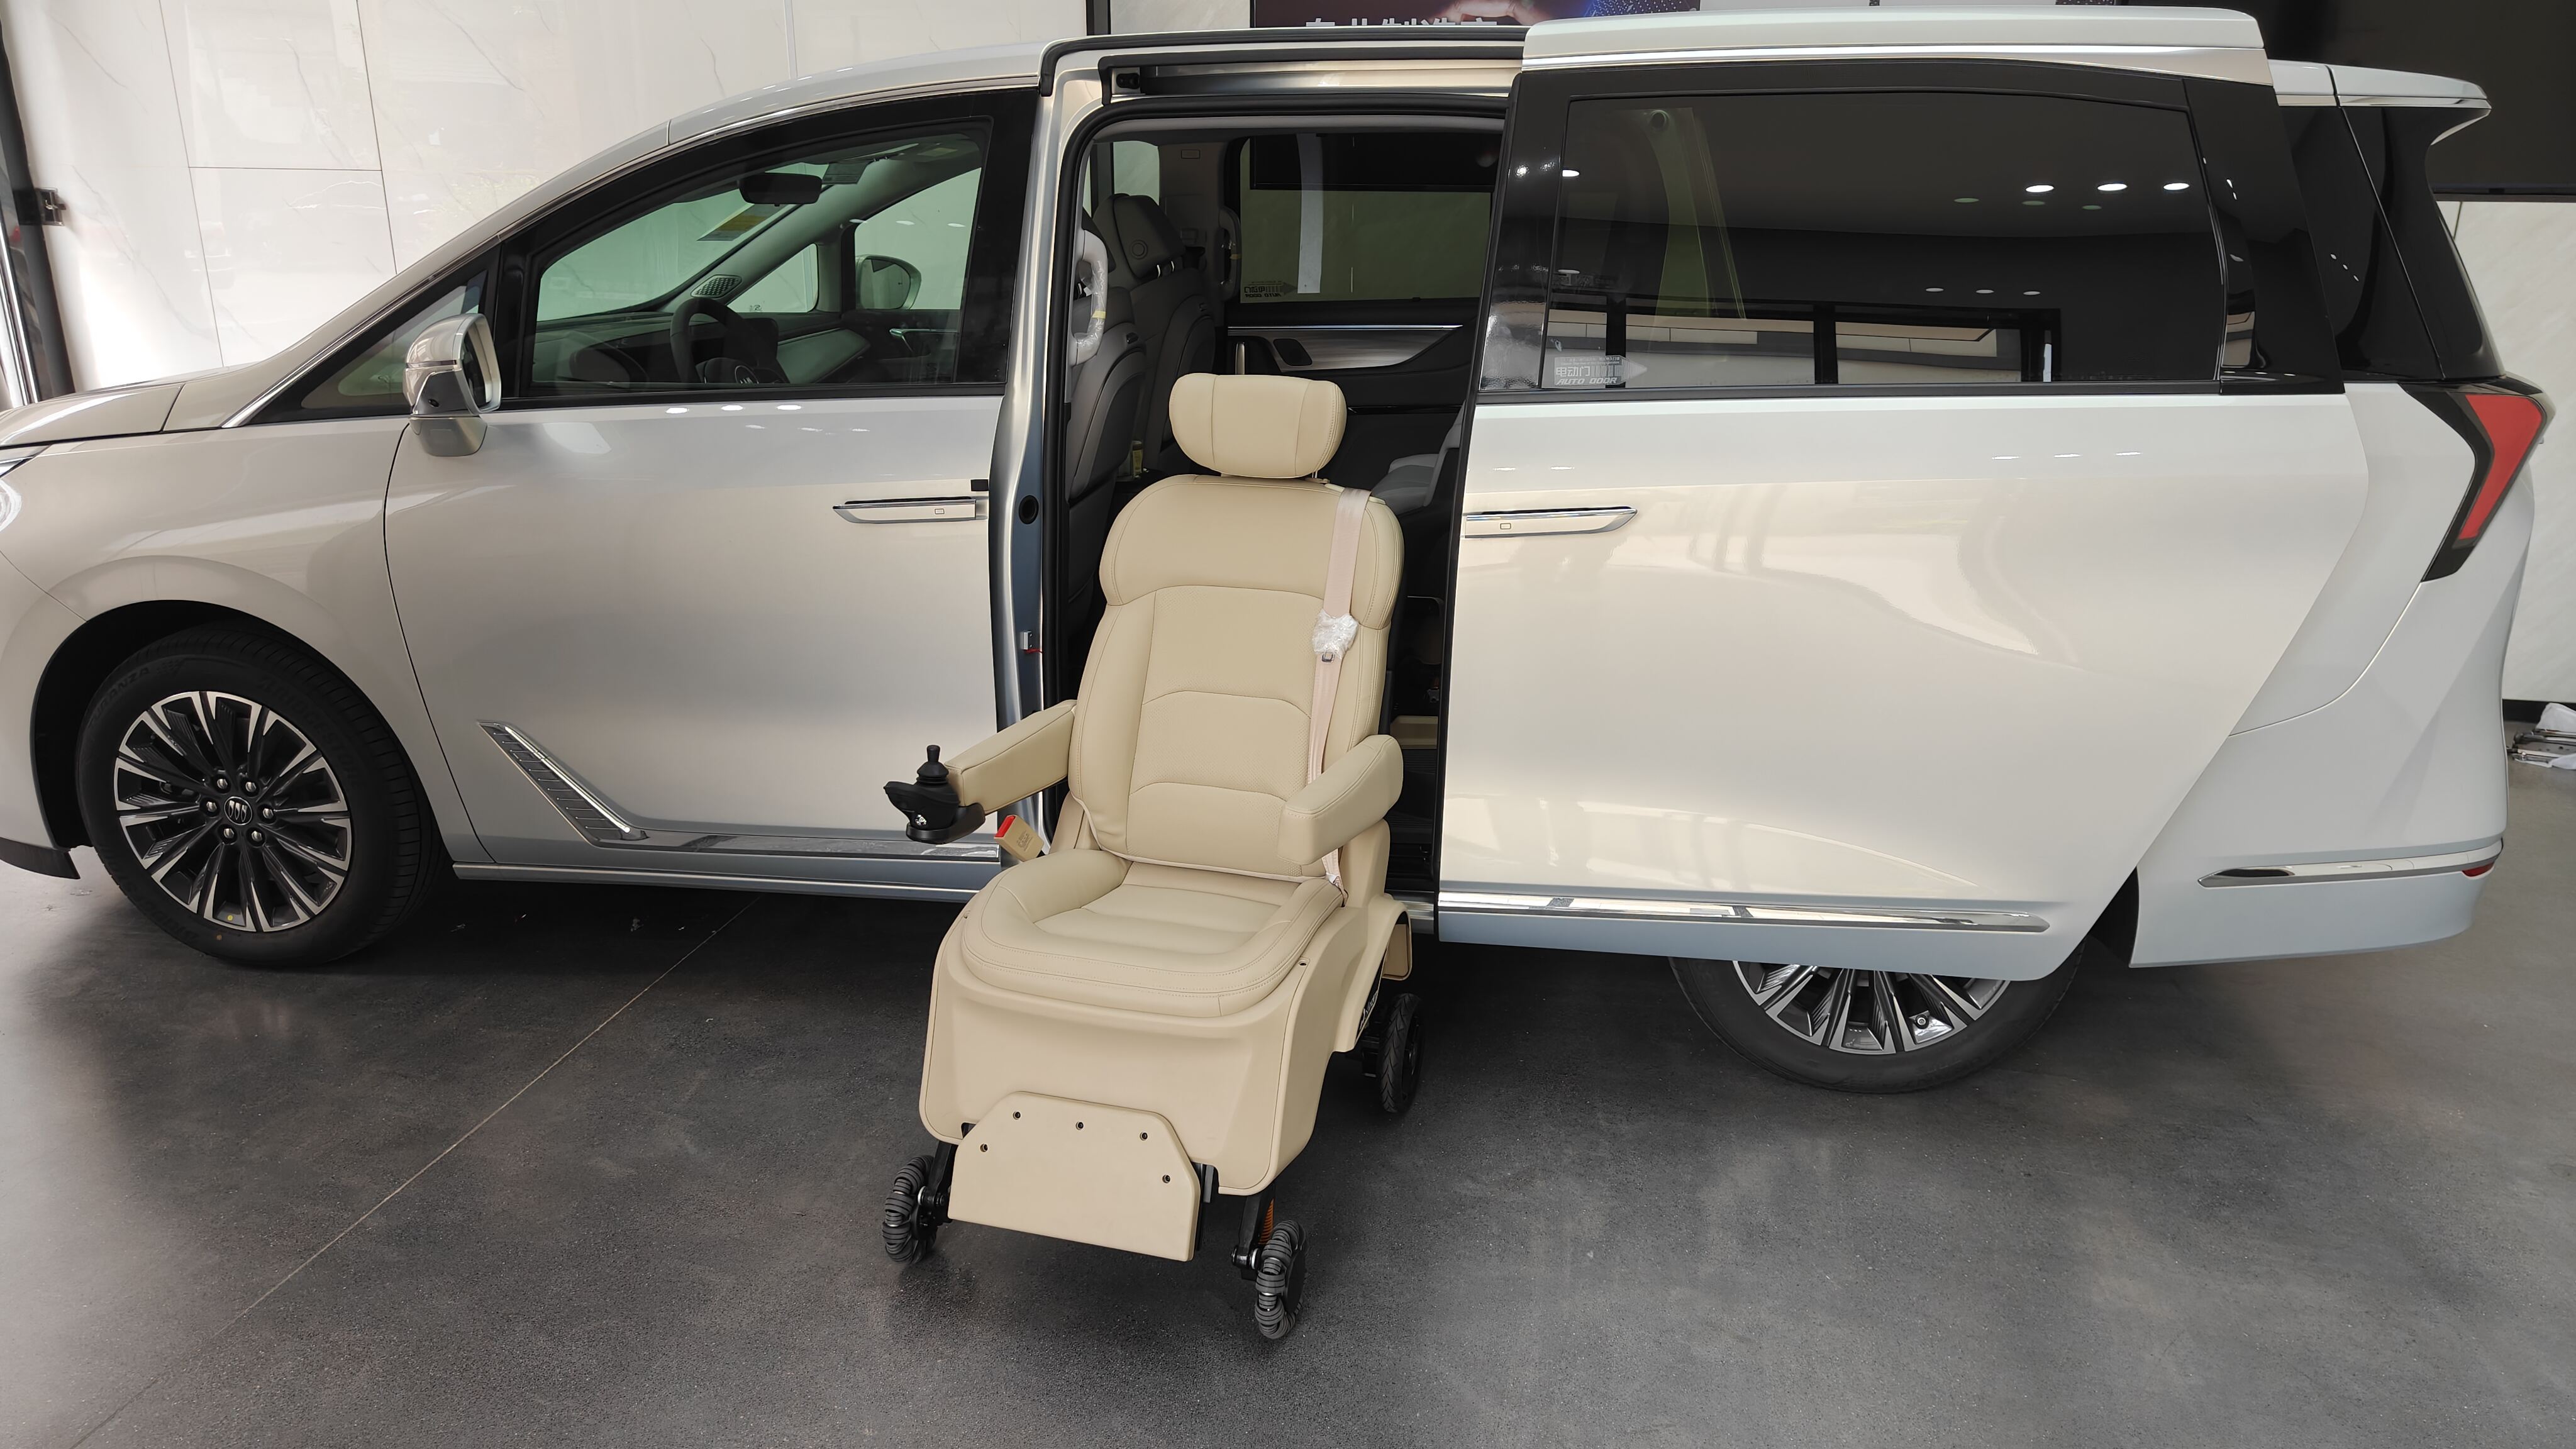
Safety & Compliance: Reinforcement, Anchoring, and Regulatory Alignment
Van Floor Reinforcement Protocols and NHTSA-Aligned Conversion Practices
Van factory floors just don't hold up well against all that twisting force when things get shaken up during accidents. According to guidelines from the National Highway Traffic Safety Administration, anyone installing swivels after purchase needs to keep the vehicle safe in crashes. That means putting those load distributing plates right under every single mounting spot. Some recent crash tests back this up too. When researchers looked at what happened in 2023, they saw that vans without proper reinforcement crashed apart 68 percent quicker during sideways impacts. For real safety, stick with conversion kits approved by NHTSA standards. These should include those heavy duty stamped steel plates that actually cover several floor ribs. And when tightening everything down, forget about guessing or using impact drivers. Get out those calibrated tools and check those torque specs between 95 and 110 foot pounds. Precision matters here.
Child Restraint Anchor Integrity: When Modification Is Permitted vs. Prohibited
Relocating or modifying factory LATCH anchors is strictly prohibited unless certified by the original vehicle manufacturer. FMVSS 225 mandates that LATCH systems withstand 6,000 N of force—a threshold easily compromised by obstruction, misalignment, or nearby drilling. Supplemental anchors may be added only if:
- They’re welded directly to reinforced cross-members (never sheet metal),
- Pass independent pull-testing exceeding OEM force requirements, and
- Do not impede unobstructed 360° rotation.
Avoid drilling within 4 inches of existing anchors: metallurgical studies (2024) show micro-fractures in that zone reduce load capacity by up to 40%.
Electrical Integration for Power Swivel Seats
Getting electrical systems right for those power swivel seats isn't just about making things work smoothly. The wire gauge matters a lot actually. Most folks go with 14 to 16 AWG wires for this job, and don't forget to install proper fuses or circuit breakers that match what the motor needs. When running the wiring harness, keep it clear of places where something might pinch it, stay away from hot spots like exhaust pipes or catalytic converters, and definitely avoid any moving parts. If the harness runs close to fuel lines or brake components, wrap it in good quality automotive conduit. Modern cars have these CAN bus systems, so compatibility is key. Always use OEM approved adapters here because cutting corners by bypassing or splicing into data lines can really mess things up big time. Airbags might stop working properly, or worse yet, the car could throw error codes that never go away. Check if the motor runs on 12 volts or 24 volts and make sure it matches what the vehicle provides. Mixing them up will ruin the motor pretty quickly. Before finishing everything off, grab a multimeter and double check the polarity and grounding at the chassis first. Then cover all connections with heat shrink tubing that has adhesive lining inside. After installation, spin the seat through its full range and make sure none of the wires are pulling tight anywhere. Test out all the functions too when the ignition is on, when the engine is running, and even in accessory mode just to be safe.